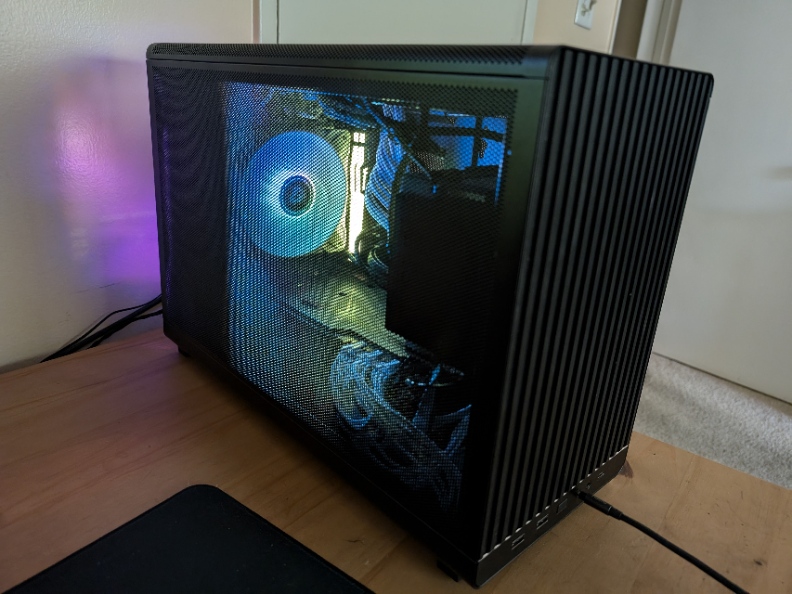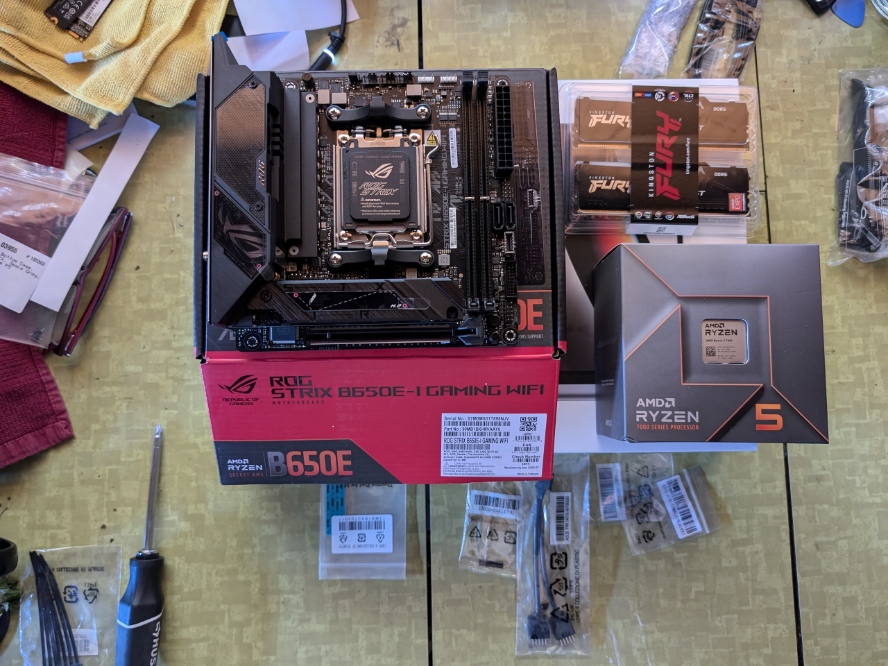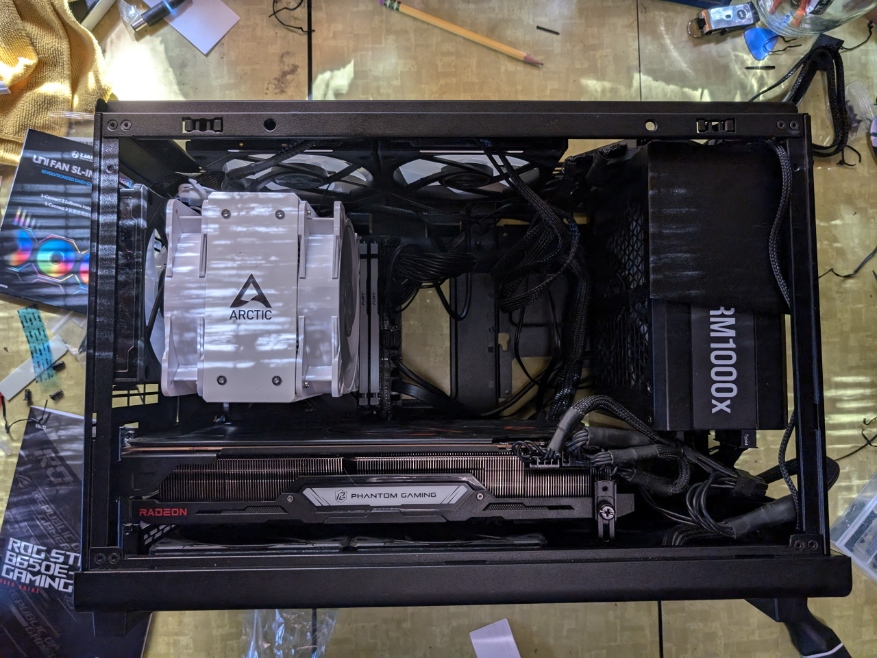
I build all of my own PC’s from scratch. Have done for almost 20 years now. It’s not for everyone as there is a lot of research and detail work that you need to do. But every 3 or 4 years I either upgrade my current PC build or build a new one.
This year I decided to upgrade as money is a little tight. I figured I could re-use several key parts of my old PC build and just buy the new parts I need.
I was inspired to do this by a video I saw on YouTube: This Micro ATX PC Build Hits the Spot by Mr. Matt LeeIt is a beautiful video with no words. None of that high energy spiel that can be so annoying. Nope. Matt just shows his build process in beautifully framed shots backed by wonderful music –
Micro ATX is a much smaller form factor than the ATX size of my current build. Approximately half of the size it looks like.
I started pricing and research and decided to build around the case that Matt Lee featured: The Lian Li A3 Dan case which was about $70 on amazon. I also wanted to continue with an AMD processor because they run cooler and require less power than Intel. I bought an AMD 7600 CPU which was approximately $180.

I was thinking of going with liquid cooling, but the space at the top of the case looked tight, so I went with a two fan Arctic Cooler (cheap at $46)
I needed a new motherboard since it was going into the MicroATX form factor. This was hard since there are several good candidates, but eventually I went with a more expense mobo – Asus Rog Strix. I’ve had good experiences using Asus motherboards and this one had excellent reviews. This motherboard put me back about $299
I carried over my case fans and GPU from my old system – AMD 7800x (and excellent, but very large card). Also, I was bringing over a 1000 was power supply, but concerned about its size (ATX power and huge).
Total cost for upgrade = $600.
With all of the parts in hand, I began the build and immediately found problems with the size of my power supply. Fortunately, the Lian Li case has an adjustable power case, so I was just able to fit it in with the big GPU. Hit the on button and
Nothing.
I’ve never built a system that didn’t at least turn on when I pushed the power button for the first time. After a evening checking connections and thinking, I felt it was the power supply that was the problem, so I purchased an SFX sized (much smaller) PSU from Lian Li for $150
Started the build again from the beginning and loved how efficient and small the power supply was. Pushed the power button and the machine started right up. Booted into the bios and changed the boot order so I could install Windows 11 from a USB stick and I was off to the races.
However, fans were a problem. Only one set of fans were spinning the others (5 chassis fans) were not. This problem blossomed into 3 days of stress and frustration. You see, the Asus motherboard only has two motherboard fan headers with a third designed for a liquid cooler mother (but can be used for fans). The problem was getting all of the fans hooked into power.

After ordering two sets of fans (6 total) and a special Arctic Cooler power hub, I was able to get all of my fans working like they should. This put me back another $250. And I realized that the Matt Lee video did not cover installation of fans and their power issues. It would have saved me time and expense if he did.
Finally, after spending $850 for all of my parts, and about a week of frustration, I have an excellent PC that sits on my desk and plays Elden Ring at its highest resolution.
Advice: study your system carefully before you start spending money. I thought I did, but I missed the fan power issues and the fact that I would have to remove the GPU every time I changed the bottom 3 fan cluster. Since the MicroATX form factor is much smaller, it has fewer headers for fans. Consider a $10 fan hub from Arctic Cooler as it will solve all of your problems.


Leave a Reply